


Hello everyone 👋, I, Atharva Deshpande am back with another article. This article focuses on creating a very simple app that uploads files to IPFS using Next.js.
Here is the link to GitHub Repository. You can go ahead and get the code directly but I would recommend reading through the article once.
Prerequisites
Basic knowledge of Blockchain and IPFS.
Any code editor. ( I would be using VSCode )
Basic understanding of Javascript
Machine with NodeJS installed.
Introduction
IPFS
IPFS is a way of storing and sharing files on the internet in a decentralized way. Instead of using a single server or central authority to host files, IPFS uses a network of computers to store and distribute files. This means that anyone can access and share files on the network without needing to go through a central server or authority. IPFS also uses a special kind of addressing system, which means that files are identified by their content, rather than by their location. This makes it possible to access files on the network without knowing where they are stored, which can make it more efficient and resilient than other ways of storing and sharing files online.
Let's BUIDL It 🛠️
Step 1: Pinata Account Setup
Head over to Pinata and create an account
Login to the account and click on "Developers" on the top NavBar.
Click on "New Key", create an API key and copy the secret as you will not be able to look at the secret again.
Step 2: Write some code 💻
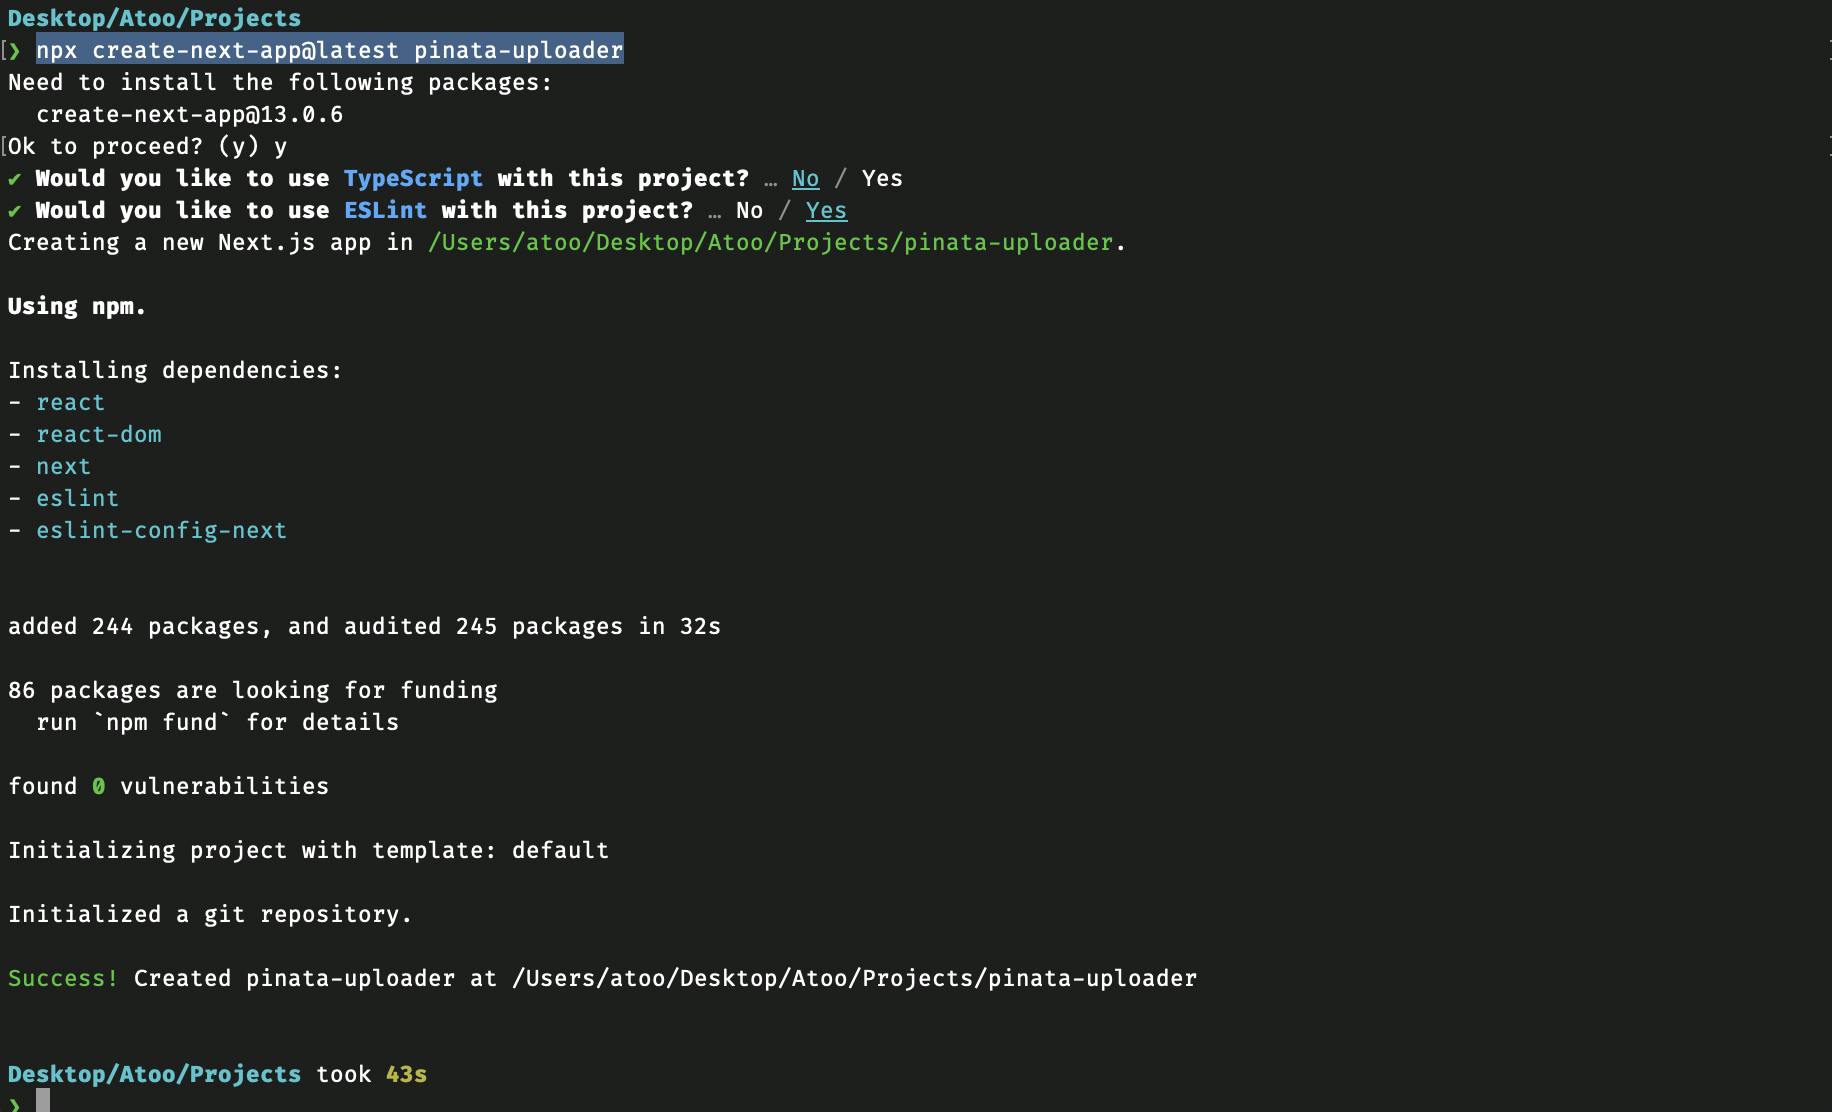
Type in the command below in the terminal.
Note:
pinata-uploaderis the name of the project that I have put. You can put it anything you like.npx create-next-app@latest pinata-uploaderSelect "No" when the prompt asks you for using Typescript in the project and hit enter.
This is how your terminal would look after successful creation of the Next.js project.
Open the project in VSCode using the command
code pinata-uploaderBy running the command
npm run devyou should be able to see the default UI provided by Next.js at localhost.
Create a
.envfile in the root of your project and put in your API key and API Secret as below.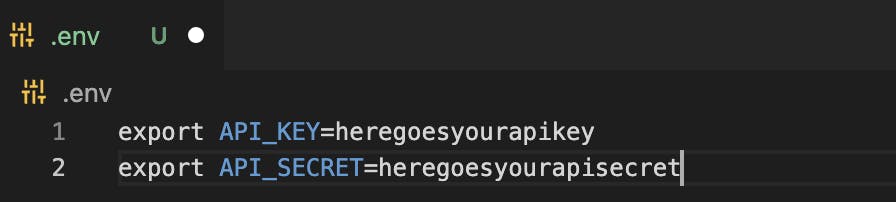
Save the file and head over to
next.config.jsin the root folder and replace it with the following./** @type {import('next').NextConfig} */ const nextConfig = { reactStrictMode: true, env: { API_KEY: process.env.API_KEY, API_SECRET: process.env.API_SECRET } } module.exports = nextConfigNOTE: Don't forget to load these env variables using the command
source ./.envin Linux/macOS terminal.Finally, we would be now writing the main code which deals with Pinata.
- Go to
pages/index.jsand replace theHomefunction with the following
export default function Home() {
  return (
    <div className={styles.container}>
      <input type='file' onChange={(e)=>setFile(e.target.files[0])}></input>
      <button onClick={handleUpload}>Upload</button>
      <ul>
        {
          pinnedFiles && pinnedFiles.map(file => (
            <li key={file.id}>
              <a href={`https://gateway.pinata.cloud/ipfs/${file.ipfs_pin_hash}`} target='_blank' rel='noreferrer'>{file.metadata.name}</a>
            </li>
          ))

        }
      </ul>
    </div>
  )
}
On saving the file you will get some error related to handleUpload function not existing. Let's fix that:
Write a simple function defition which does nothing
const handleUpload = async () => {
}
When you save this, you will get another error. Add the following line to solve it
const [pinnedFiles, setPinnedFiles] = useState([])
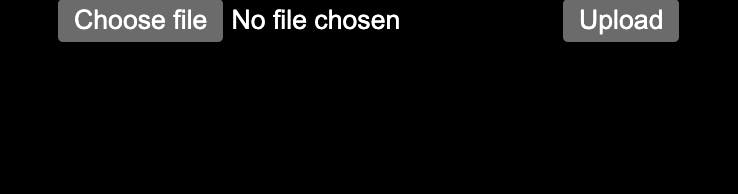
You should now be able to see a very bad UI with a simple upload button and file selector.
Let's make these things work.
Since we would be dealing with Pinata APIs, we would need to install
axiosby typing the commandnpm i --save axiosDefine a Pinata Config variable like this
const pinataConfig = {
    root: 'https://api.pinata.cloud',
    headers: {
      'pinata_api_key': process.env.API_KEY,
      'pinata_secret_api_key': process.env.API_SECRET
    }
};
Create a test function to check if we are indeed able to make the API call.
const testPinataConnection = async() => {
    try {
      const url =`${pinataConfig.root}/data/testAuthentication`
      const res = await axios.get(url, {headers: pinataConfig.headers});
      console.log(res.data);
    } catch (error) {
      console.log(error)
    }
}
Call this function on page load using the useEffect function.
useEffect(() => {
    testPinataConnection()
});
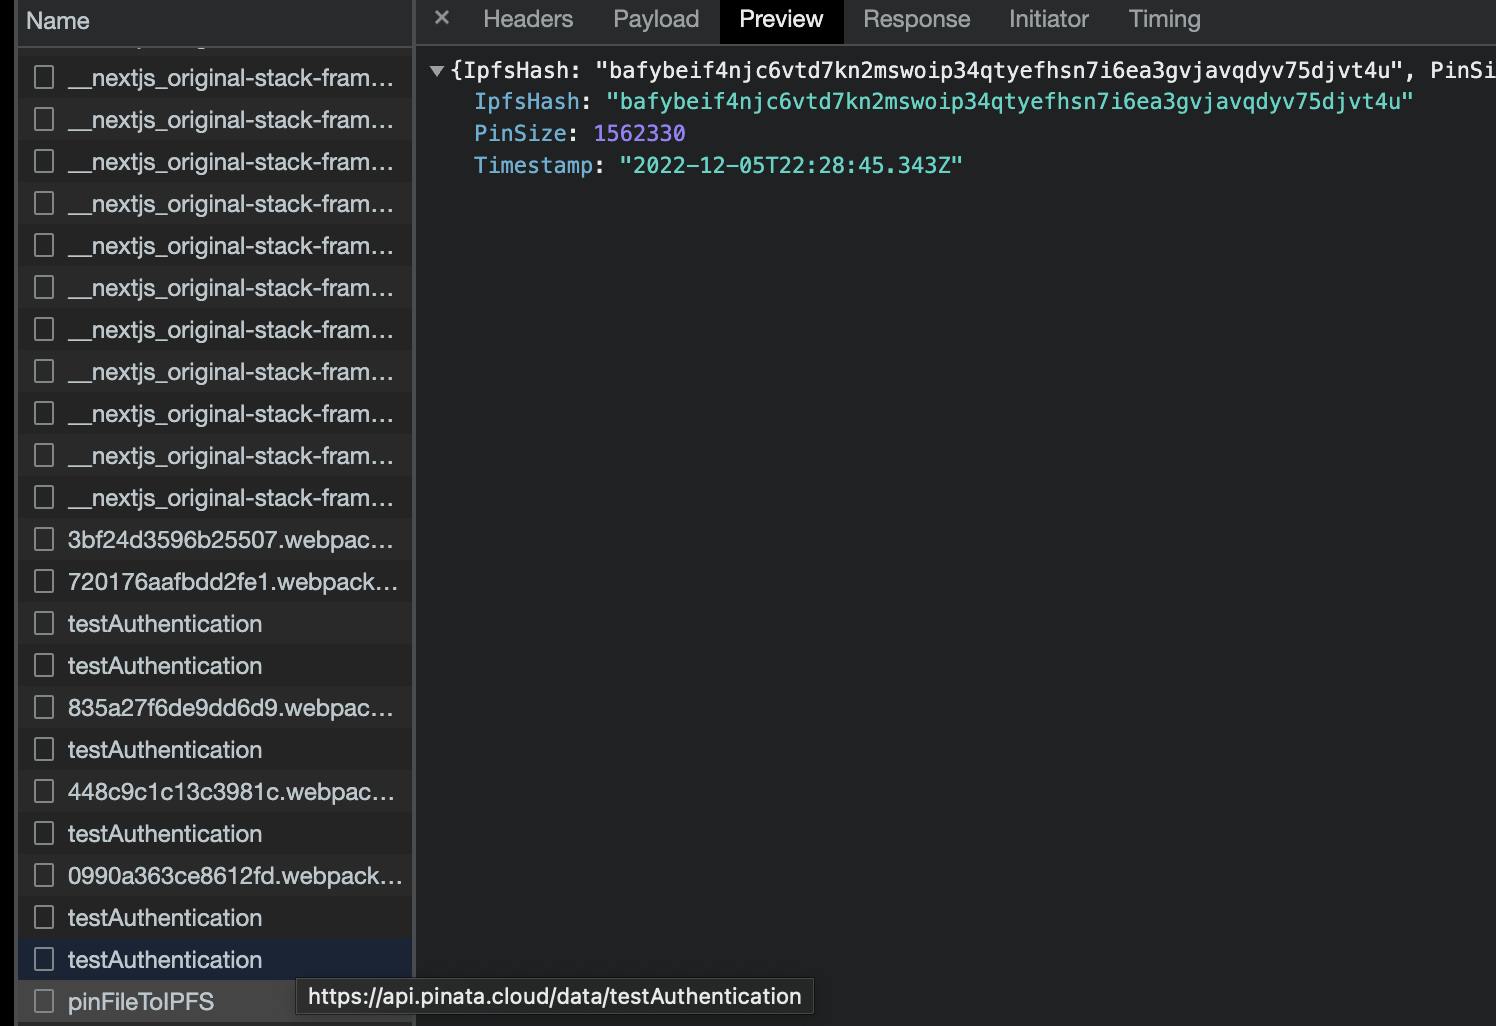
Open the developer tools and head over to console to see a success message from pinata. If you don't see any message then recheck all the steps we did above very carefully.
By far, your index.js should look like this
import Head from 'next/head'
import Image from 'next/image'
import { useEffect, useState } from 'react'
import styles from '../styles/Home.module.css'
import axios from 'axios'

export default function Home () {
  const [pinnedFiles, setPinnedFiles] = useState([])
  const [file, setFile] = useState(null)
  const handleUpload = async () => {
  }

  const pinataConfig = {
    root: 'https://api.pinata.cloud',
    headers: {
      'pinata_api_key': process.env.API_KEY,
      'pinata_secret_api_key': process.env.API_SECRET
    }
  };

  const testPinataConnection = async () => {
    try {
      console.log(pinataConfig)
      const url = `${pinataConfig.root}/data/testAuthentication`
      const res = await axios.get(url, { headers: pinataConfig.headers });
      console.log(res.data);
    } catch (error) {
      console.log(error)
    }
  }

  useEffect(() => {
    testPinataConnection()
  });

  return (
    <div className={styles.container}>
      <input type='file' onChange={(e) => setFile(e.target.files[0])}></input>
      <button onClick={handleUpload}>Upload</button>
      <ul>
        {
          pinnedFiles && pinnedFiles.map(file => (
            <li key={file.id}>
              <a href={`https://gateway.pinata.cloud/ipfs/${file.ipfs_pin_hash}`} target='_blank' rel='noreferrer'>{file.metadata.name}</a>
            </li>
          ))

        }
      </ul>
    </div>
  )
}
Now let's get to adding the functionality of actually uploading a file to IPFS. We will update the handleUpload function to this.
  const handleUpload = async () => {
    try {
      if (file !== undefined) {
        const formData = new FormData();
        console.log(file)
        formData.append('file', file);
        const pinataBody = {
          options: {
            cidVersion: 1,
          },
          metadata: {
            name: file.name,
          }
        }
        formData.append('pinataOptions', JSON.stringify(pinataBody.options));
        formData.append('pinataMetadata', JSON.stringify(pinataBody.metadata));
        const url = `${pinataConfig.root}/pinning/pinFileToIPFS`;
        const response = await axios({
          method: 'post',
          url: url,
          data: formData,
          headers: pinataConfig.headers
        })
        console.log(response.data)
        queryPinataFiles();
      } else {
        alert('select file first')
      }
    } catch (error) {
      console.log(error)
    }
  }
You would notice the queryPinataFiles function being called inside, but we haven't yet defined it. Let us define the function body.
const queryPinataFiles = async () => {
    try {
      const url = `${pinataConfig.root}/data/pinList?status=pinned`;
      const response = await axios.get(url, pinataConfig);
      console.log(response.data.rows)
      setPinnedFiles(response.data.rows);
    } catch (error) {
      console.log(error)
    }
  };
Save the file and head over to your app and keep the network tab open.
Choose any file and press upload to pin it to IPFS. You would see a network call to IPFS being made and once it is successful you would get an IPFS hash in the Response section of the Request. This implies that you have successfully uploaded your file to the network.
One final thing which is remaining is loading the files you uploaded on start of the app. Simple call the queryPinataFiles function in the same useEffect
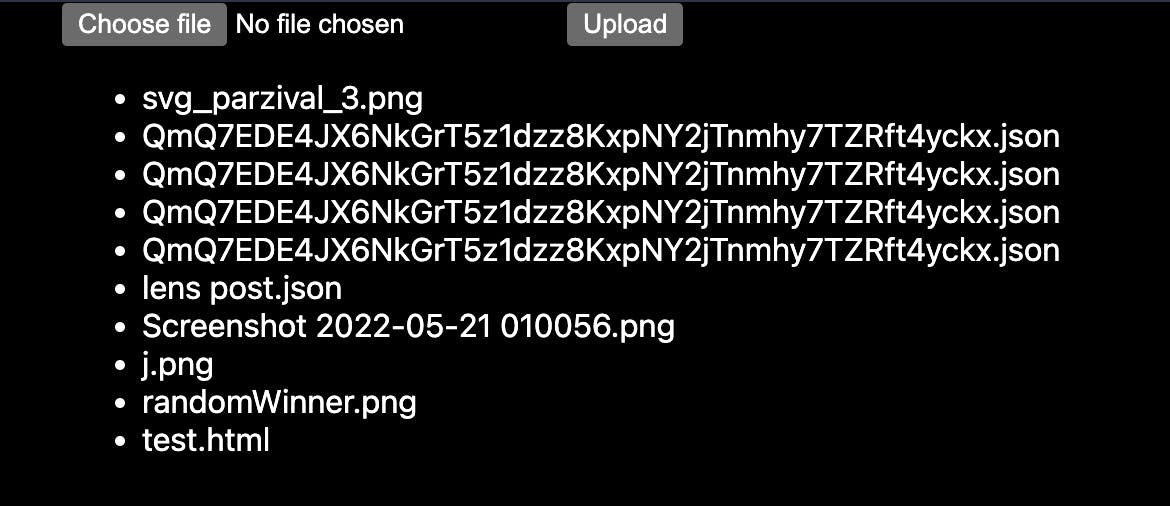
There are all your files pinned to IPFS. Click on the filename to see the actual details
VOILA YOU HAVE DONE IT!!!
Support
If you liked my article, consider supporting me with a coffee ☕️ or some crypto ( ₿, ⟠, etc)
Here is my public address 0x7935468Da117590bA75d8EfD180cC5594aeC1582

Lets connect
Feedback
Let me know if I have missed something or provided the wrong info. It helps me keep genuine content and learn.