Discord Bot with Slash Commands
Using NodeJs

Member @Developer DAO
Hello everyone 👋, I am Atharva Deshpande and this is my first attempt at writing an article to guide developers transition into the slash command feature of discord bots.
In this article, we would be understanding how to migrate to the new slash commands in discord and why are we even migrating. We would be building a simple bot that will respond to the command with some message.
Here is the link to Github Repository. You can go ahead and get the code directly but I would recommend reading through the article once
Prerequisites
Familiar with the process of creating bot in the developer portal.
Note: Do not forget to select
applications.commandswhile generating invite link.Any code editor. ( I would be using VSCode )
Basic understanding of Javascript
Machine with NodeJS installed.
Introduction
What is discord.js ?
It is basically an npm package that interacts with the Discord APIs in a much more developer-friendly way.
What are Slash Commands in Discord?
After August 2022, Discord is enforcing bot developers to apply for a Message Intent if the bot is in 100 or more servers and it needs to read the messages sent by anyone on the channels it has access to.
Currently, any bot would work on listening to these messages and checking if it matches any of the commands it has. For example, the bot Uncle Jim (fun fact: I developed it!!) has a prefix of b!. If a user types in b!help the bot would check if it matches the prefix and further checks if there exists a command called help and would process accordingly.
But all this will change post-August and now Discord has implemented a feature called slash command wherein just typing a simple / would prompt the user all the commands of all the bots present on the server (pretty amazing and nice IMO).
Setting up the project
Create a folder, open a terminal and navigate inside the folder. Now type:
npm init -yThe
-yflag indicates a yes to all the questions asked while initializing the project. You can go ahead and use the command without the flag to see what all questions
are being asked.A
package.jsonfile would be generated and would look something like this:{ "name": "slashcommand-discord-bot-tutorial-hashnode", "version": "1.0.0", "description": "", "main": "index.js", "scripts": { "test": "echo \"Error: no test specified\" && exit 1" }, "keywords": [], "author": "", "license": "ISC" }
Installing the required dependencies
Open up the terminal ( if you are on vscode press cmd/ctrl + ` ) and type the
following:npm i nodemon discord.js @discordjs/builders @discordjs/rest discord-api-types- nodemon: It is a library that restarts the code on every file saved on its own so that we don't need to worry about restarting the bot whenever we make changes.
- discord.js: This is the backbone of the entire bot as it deals with interacting with Discord's API and makes the bot respond to commands.
- Rest of them are the libraries that enable the slash commands feature.
Setting up the scripts in
package.jsonOpen up the
package.jsonfile and update thescriptsobject to look like this:"scripts": { "start": "node index.js", "wsl": ". ./.env && nodemon index.js", "linux": "source ./.env && nodemon index.js" },- The
startscript is used for deployment on Heroku or services similar to that - The
wslscript is for the people who are using wsl (Windows Subsystem for Linux) on their Windows devices. - The
linuxscript is for people working on Linux or macOS.
- The
Writing the code
Create a file
index.jsat the root of your project and paste the following code:const { Client, Collection, Intents } = require('discord.js'); const client = new Client({ intents: [Intents.FLAGS.GUILDS] }); client.slashCommands = new Collection(); client.on('ready', async () => { var memCount=client.guilds.cache.reduce((x, y) => x + y.memberCount, 0); console.log(`Bot has started, with ${memCount} users, in ${client.channels.cache.size} channels of ${client.guilds.cache.size} guilds.`); }) client.login(process.env.BOT_TOKEN);This is a basic code where in the first few lines we import the required libraries and the functions we want. We create a new
Collectioncalled asslashCommandsto store the data necessary to run and deploy the commands (would be covered below).client.on('ready', async () => { var memCount=client.guilds.cache.reduce((x, y) => x + y.memberCount, 0); console.log(`Bot has started, with ${memCount} users, in ${client.channels.cache.size} channels of ${client.guilds.cache.size} guilds.`); })Here we are getting member count across all the servers and then getting server and channel count just to make sure the bot is up and running. The last line is basically logging in the bot and getting it online.
We set the
BOT_TOKENin the.envfile mentioned in the next step.Create a
.envfile in on the same level and add yourBOT_TOKENretrieved from the Discord Developer Portal. The file should look like thisBOT_TOKEN=YOUR_TOKEN_HEREIf you are on WSL run the command
npm run wslotherwise run the command
npm run linuxIf everything is set up correctly you can see the bot being online on discord. Also
the terminal should look something like this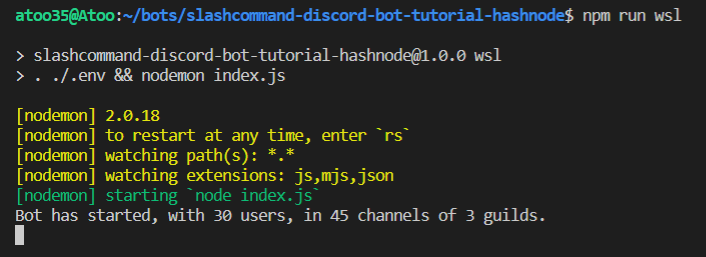
Note: The numbers would vary
If you see the bot online and the terminal looking like that then kudos!!! You have successfully booted the bot 🎉🎉
Lets finally write a simple slash command
Create a file
hello.jsat the root folder just like the rest of the files. Paste the following code in the fileconst { SlashCommandBuilder } = require('@discordjs/builders'); module.exports = { data: new SlashCommandBuilder() .setName('hello') .setDescription('A simple hello command'), async execute (interaction) { return interaction.reply('How are you?') }, };In this code, we are importing some libraries and then in
module.exportswe are basically exporting the metadata as well as theexecutefunction which gets executed when the command is triggered.Now if you type in the
npm run linuxornpm run wslcommand and try to type/Helloyou won't be able to see any command popping up on Discord. That is because we need to register these commands first.Let's do that now:
Create a file named
deploy-commands.jsat the root of the project. Paste the following code:const { REST } = require('@discordjs/rest'); const { Routes } = require('discord-api-types/v9'); const commands = []; const deploySlashCommands = async () => { const rest = new REST({ version: '9' }).setToken(process.env.BOT_TOKEN); const applicationId = 'YOUR_APPLICATION_ID' const guildId = 'YOUR_GUILD_ID' const command = require('./hello'); commands.push(command.data.toJSON()); // This commented code should be uncommented if you want to deploy the commands globally in all the servers /* rest.put(Routes.applicationCommands(applicationId), { body: commands }) .then(() => console.log('Successfully registered application commands.')) .catch(console.error); */ // Comment this if you are deploying commands globally rest.put(Routes.applicationGuildCommands(applicationId, guildId), { body: commands }) .then(() => console.log('Successfully registered application commands.')) .catch(console.error); } deploySlashCommands();Here we are simply using standard code to deploy the slash commands to a specific server as we are still in the process of building the bot. You need to get the
applicationIdand theguildIdfrom the Discord developer portal and the Discord app respectively.After getting the required IDs change the lines:
 const applicationId = 'YOUR_APPLICATION_ID'
 const guildId = 'YOUR_GUILD_ID'
with your values.
 const command = require('./hello');
 commands.push(command.data.toJSON());
These lines are simply getting the required slash command file and the data using
command.data.toJSON()to then push it to thecommandsarray. This array is then further passed on below in an API call as a body parameter.rest.put(Routes.applicationCommands(applicationId), { body: commands }) .then(() => console.log('Successfully registered application commands.')) .catch(console.error);The above code is commented, which basically deploys the commands globally, i.e. in all the servers the bot is present. Simply comment and uncomment the appropriate code while deploying to only one server or all of them.
Now, run the command with the terminal open at root:
node deploy-commands.jsUpon successful deployment, your terminal should look like this

Hold on, we are not done yet. All we did till now is initialize the bot, write a slash command, register the slash command and get the bot online. The most critical part of listening to those commands is still not implemented.
Final piece to listen to the commands
Add the following code in your
index.jsanywhere beforeclient.login(process.env.BOT_TOKEN)const readSlashCommands = () => { let command = require(`./hello`); console.log("Successfully loaded " + command.data.name) client.slashCommands.set(command.data.name, command); } readSlashCommands() client.on('interactionCreate', async (interaction) => { if (!interaction.isCommand()) return; const command = client.slashCommands.get(interaction.commandName); if (!command) return; try { command.execute(interaction); } catch (error) { console.error(error); return interaction.reply({ content: 'There was an error while executing this command!', ephemeral: true }); } })In the
readSlashCommandsfunction, we read the only slash command we created i.ehello.js, and add it to ourslashCommandscollection as a key-value pair where the key is the name of the command and value is the command itself.Further down in the code we are actually listening to an event
interactionCreatewhich is where the magic happens. We check usingconst command = client.slashCommands.get(interaction.commandName);if such a command exists and if it does then we execute the command by calling
command.execute(interaction);We have just added a
try catchblock to avoid crashing the bot.
THIS IS IT. RUN THE BOT NOW USING THE COMMANDS WE USED EARLIER.
The bot should reply How are you? in your Discord chat like this
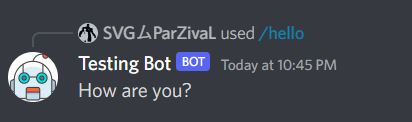
VOILA YOU HAVE DONE IT!!!
Support
If you liked my article, consider supporting me with a coffee ☕️ or some crypto ( ₿, ⟠, etc)
Here is my public address 0x7935468Da117590bA75d8EfD180cC5594aeC1582

Lets connect
Feedback
Let me know if I have missed something or provided the wrong info. It helps me keep genuine content and learn.


